Creating an NFT Lootbox on IPFS with Filebase and Thirdweb

Lootboxes are virtual gift boxes that provide a random selection of items, typically used in video games with virtual in-game items.
In this tutorial, we’ll use Thirdweb to create the same kind of effect, but with an NFT collection. There will be a variety of NFTs with multiple copies, some with many copies and some with only a few copies to create a sense of ‘rarity’ amongst the different NFTs in the lootbox.
For example, if our lootbox collection has a total of 100 NFTs, and 75 of them are copies of NFT A, and 25 of them are NFT B, then the probability of getting NFT A is 75%, and the probability of getting NFT B is 25%, making NFT B more ‘rare’ than NFT A.
To execute this, we’ll use Thirdweb, an easy to use web dashboard for building Web3 applications, to create an NFT ‘bundle collection’, that we’ll use to create a ‘pack’. Each pack will have a randomly generated number which will determine if the NFT inside is either NFT A or NFT B. Our NFT metadata and assets will be stored in a Filebase IPFS bucket.
Before we get started, you will need:
- A cryptowallet, such as MetaMask.
- Create a folder of images you’d like to use as NFT images for your lootbox.
- Download and install NodeJS.
- Have an IDE or text editor for making changes to snippets of code.
- Have a Filebase account. If you don’t have one yet, sign up here.
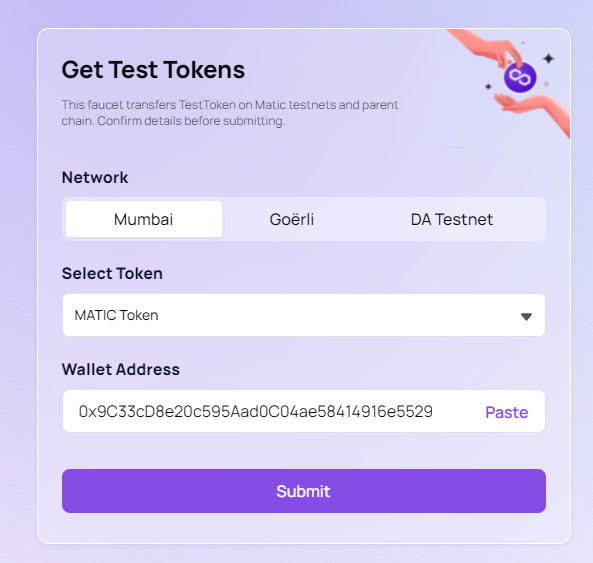
For this project, we’ll be using the Polygon Mumbai Test network, which uses the cryptocurrency MATIC.
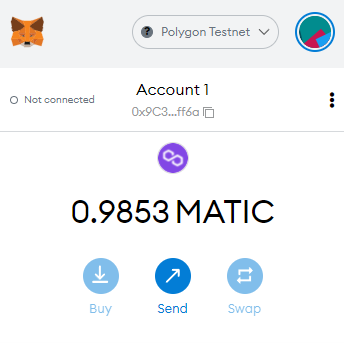
We’ll need some test MATIC for the transactions we’ll do later in this tutorial, so first let’s get some test currency by heading over to the Polygon Faucet, selecting Mumbai and MATIC, and sending some to our wallet address.
Next, let’s download the open source Github repo for this project:
git clone https://github.com/pointer-gg/thirdweb-lootbox-tutorial
Then, navigate inside of the newly downloaded project directory and install the project’s dependencies:
npm install
Start the project by starting the next.js dev server:
npm run dev
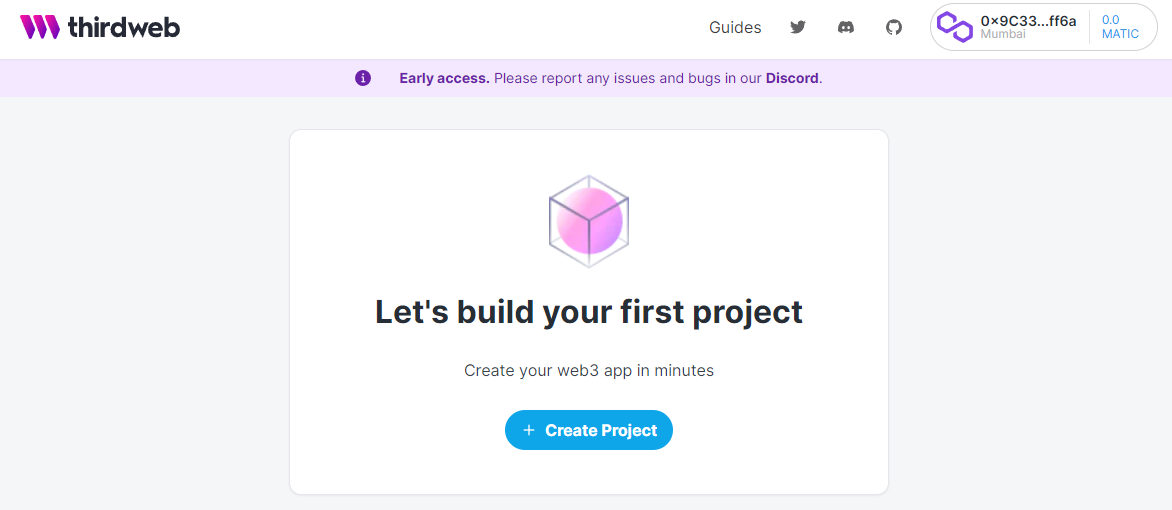
Login to the Thirdweb dashboard and connect your crypto wallet of choice to Thirdweb.
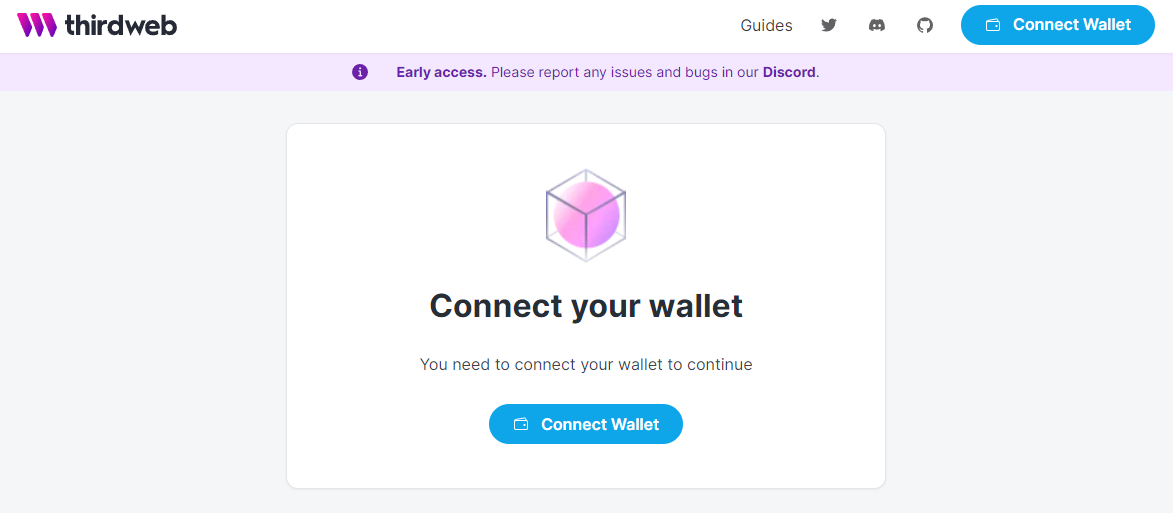
Once you’ve connected your wallet, select ‘Create Project’ to get started making your NFT Lootbox project.
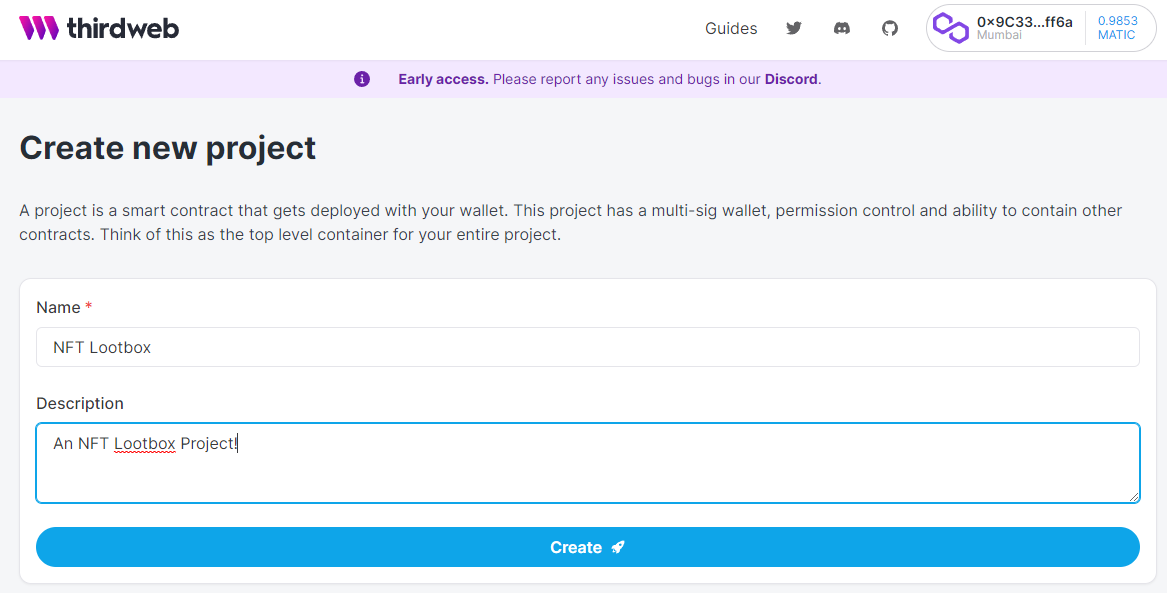
Then, choose the ‘Mumbai’ Network for your project:

Give your project a name and a description then click ‘Create’. You will be prompted to authorize a transaction through your crypto wallet which will use the MATIC we got from the faucet at the beginning of this tutorial:
Navigate into the project directory we cloned from git earlier.
Create a .env file that will hold our cryptowallet’s private key to be referenced in our project’s scripts. Use the following format, replacing X with your crypto wallet’s private key. For instructions on how to get your wallet’s private key, see here.
WALLET_PRIVATE_KEY=X
Next, install additional dependencies for our project’s scripts:
npm install @3rdweb/sdk ethers dotenv
Create a new script in the scripts directory called helpers.js. Input the following content into the script file:
import { ThirdwebSDK } from "@3rdweb/sdk";
import ethers from "ethers";

// Read environment variables from .env
import dotenv from "dotenv";
dotenv.config();

const walletPrivateKey = process.env.WALLET_PRIVATE_KEY;

if (!walletPrivateKey) {
  console.error("Wallet private key missing")
  process.exit(1)
}

export const sdk = new ThirdwebSDK(
  new ethers.Wallet(
    // Wallet private key. NEVER CHECK THE KEY IN. ALWAYS USE ENVIRONMENT VARIABLES.
    process.env.WALLET_PRIVATE_KEY,
    // We use Polygon Mumbai network
    ethers.getDefaultProvider("<https://winter-icy-sun.matic-testnet.quiknode.pro/f36aa318f8f806e4e15a58ab4a1b6cb9f9e9d9b9/>")
  ),
);

const appAddress = '0x....'; // your project address from thirdweb

export async function getApp() {
  const app = await sdk.getAppModule(appAddress);
  return app;
}
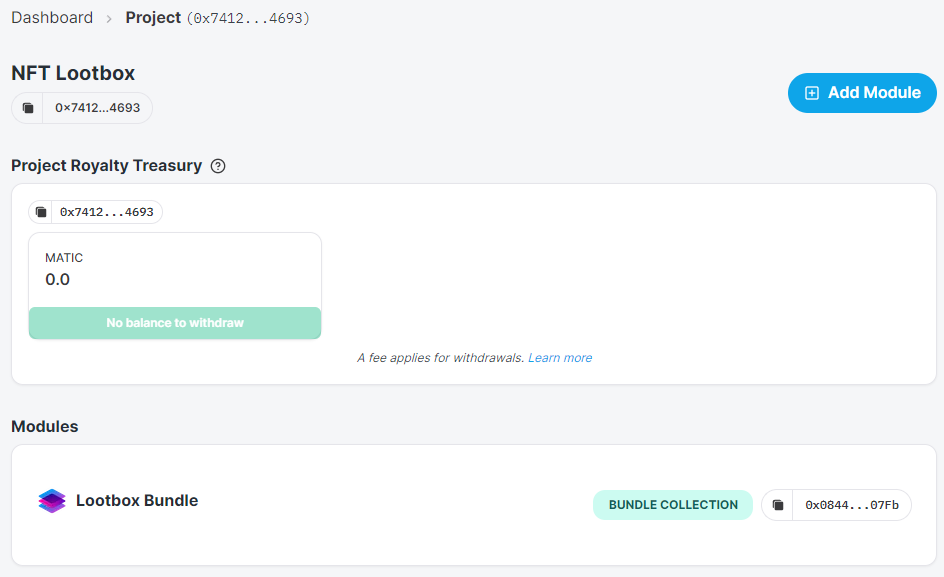
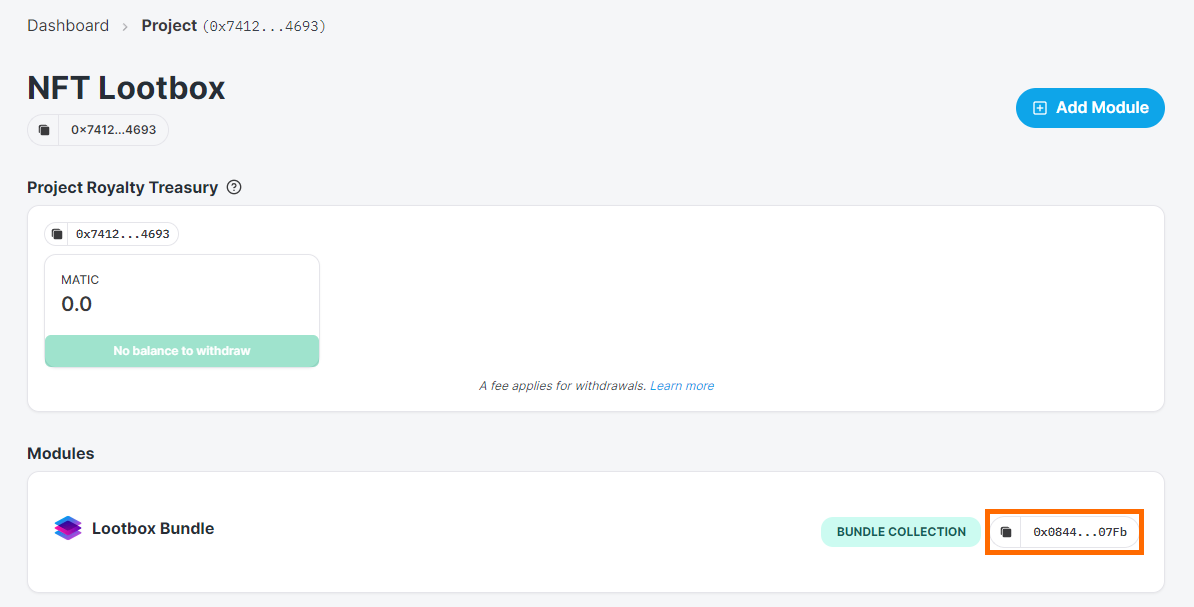
Replace the appAddress with your project’s address from Thirdweb. You can find it on your project dashboard under your project’s name:

This script initializes the project environment and sets up dependencies for use by our other scripts. It ‘helps’ the project, so that’s why it's called a helper script.
Next, create a script called 1-create-bundle-module.js in the scripts directory.
This script will create our bundle collection module that we’ll use to create our NFT collection. Input the following content into the script file:
import { getApp } from './helpers.js';

async function main() {
  const app = await getApp();

  console.log('Deploying bundle collection module...');

  const bundleModule = await app.deployBundleModule({
    name: 'Lootbox Bundle',
    sellerFeeBasisPoints: 0,
  });

  console.log(`Deployed bundle collection module with address ${bundleModule.address}`);
}

try {
	await main();
} catch (error) {
  console.error("Error creating the bundle collection module", error);
  process.exit(1);
}
Now let’s run this script to deploy the bundle collection module onto our project:
node scripts/1-create-bundle-module.js
You should get an output similar to the following. Note that your output might include some warnings about experimental features. These are coming from the Thirdweb SDK and are safe to disregard.
Deployed bundle collection module with address 0x0844EbdcFc584BdF42334D69CBEB6092f8Ba07Fb
Take note of this bundle collection module address since we’ll need it for our next step.
You can confirm that this was successful by looking at your project’s dashboard in Thirdweb:
Before we can upload our NFTs, we need to upload the NFT image files to IPFS through Filebase.
For this project, we’ll be uploading 3 images to Filebase for us to use. To do this, navigate to console.filebase.com. If you don’t have an account already, sign up, then log in. Use code "IPFS" for a 5TB free trial for one-month. (5GB always free)
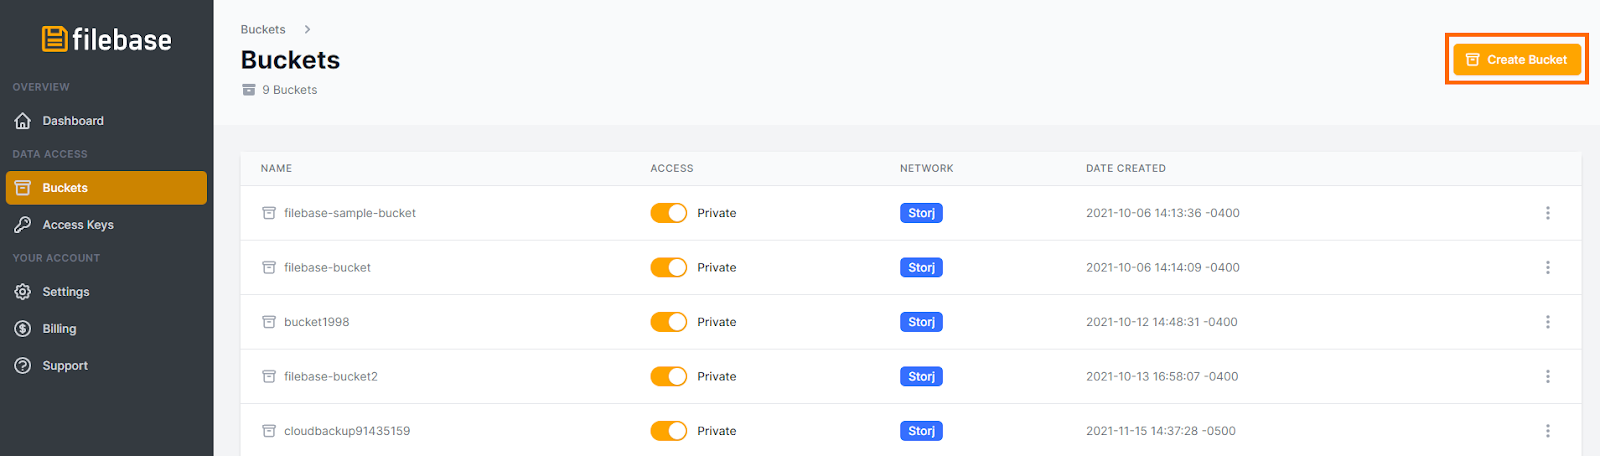
Select ‘Buckets’ from the left side bar menu, or navigate to console.filebase.com/buckets.
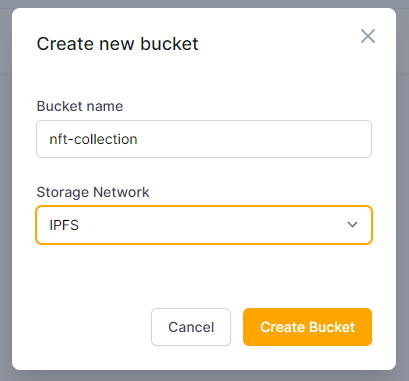
Select ‘Create Bucket’ in the top right corner to create a new bucket for your NFTs.
Enter a bucket name and choose the IPFS storage network to create the bucket.
In this guide, we’re calling the bucket nft-collection.
Bucket names must be unique across all Filebase users, be between 3 and 63 characters long, and can contain only lowercase characters, numbers, and dashes.
Next, select the bucket from your list of buckets, then select ‘Upload’ in the top right corner to upload your image files.
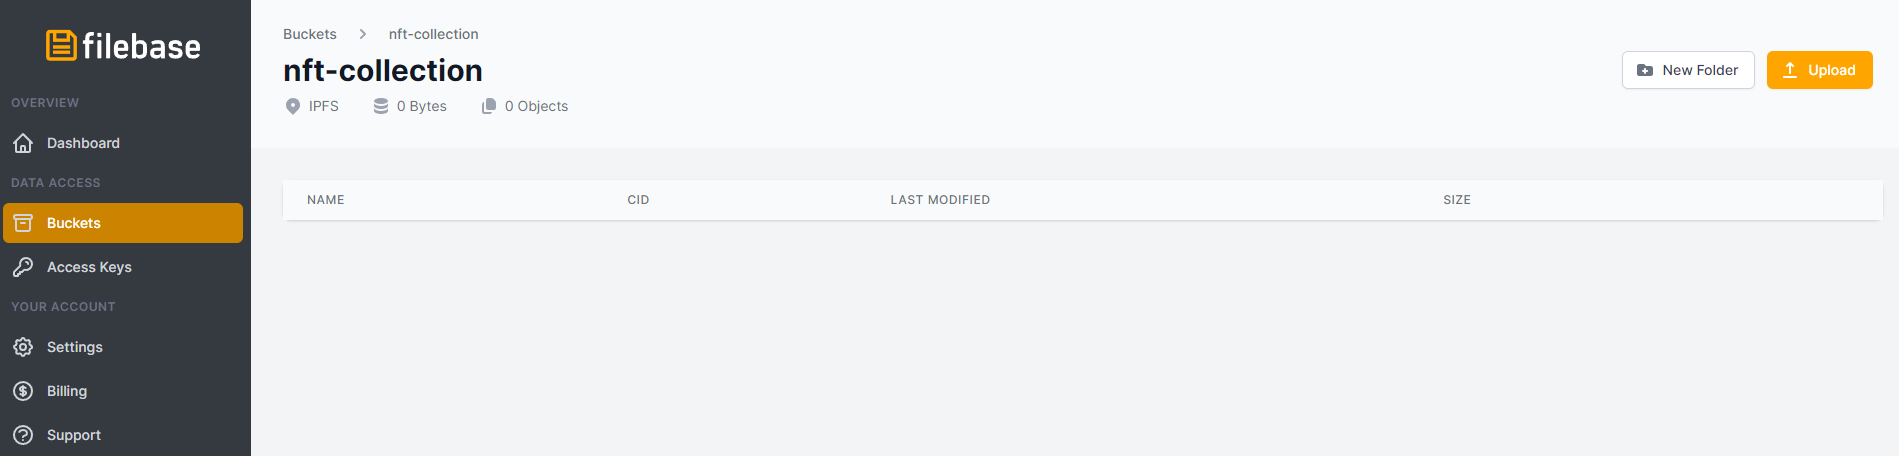
Select your images to be uploaded. Once uploaded, they will be listed in the bucket.
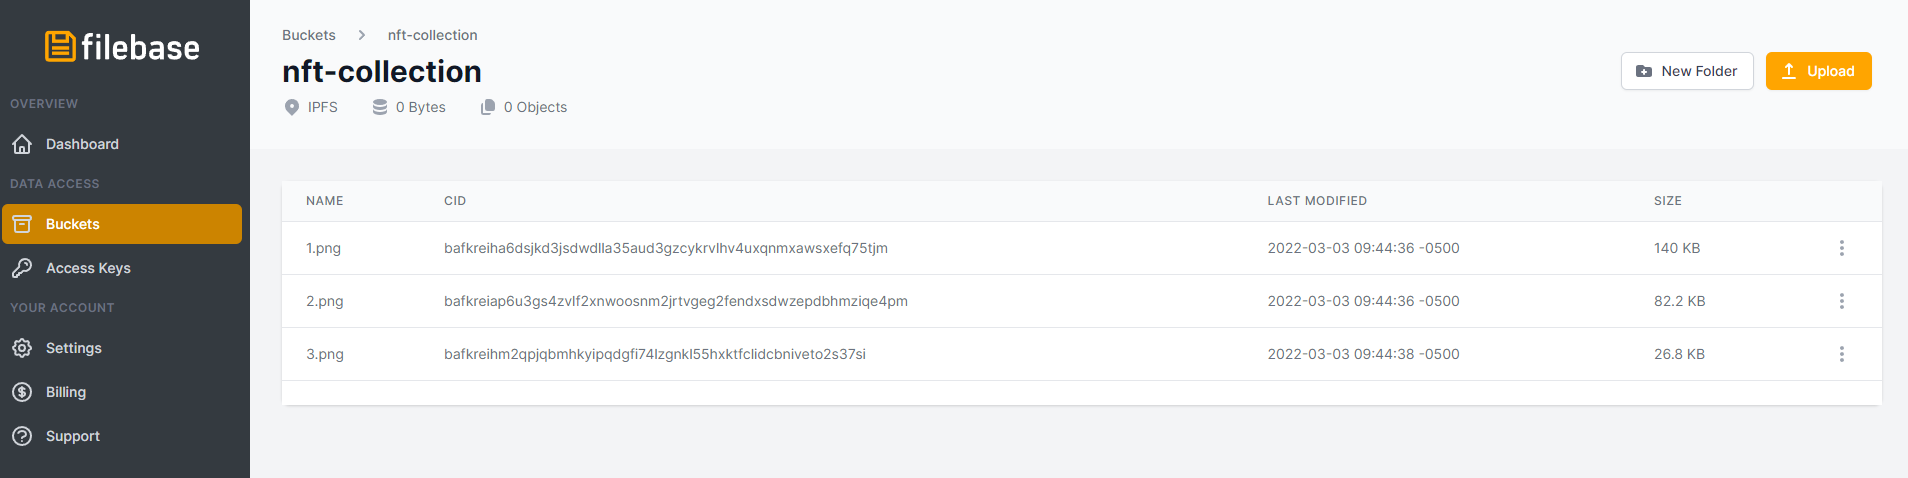
Click on each uploaded object to display the metadata for the object. Take note of the IPFS CID for each object.

Now it's time to mint our NFTs. To do so, we need a script that will create our NFT bundle. Create a new script in the scripts directory with the name 2-mint-bundle-nfts.js. Enter the following content in the new script:
import { sdk } from './helpers.js';

async function main() {
  // Paste in the address from when you created the bundle collection module
  const bundleModuleAddress = '0x...';
  const bundleModule = sdk.getBundleModule(bundleModuleAddress);

  console.log('Creating NFT batch...');

  const created = await bundleModule.createAndMintBatch([
    {
      metadata: {
        name: 'Filebase Blue Cloud',
        description: 'The first NFT in the Filebase Lootbox Bundle',
        image: 'ipfs://bafkreiha6dsjkd3jsdwdlla35aud3gzcykrvlhv4uxqnmxawsxefq75tjm',
        properties: {
          rarity: 'a bit rare',
          fanciness: 7,
        }
      },
      supply: 50,
    },
    {
      metadata: {
        name: 'Filebase Orange Cloud',
        description: 'The second NFT in the Filebase Lootbox Bundle',
        image: 'ipfs://bafkreieehizit7mnwgp4ptperkugwmam62ey2znohe56an3issdprj3dce',
        properties: {
          rarity: 'a bit rare',
          fanciness: 7,
        }
      },
      supply: 50,
    },
    {
      metadata: {
        name: 'Filebase Robot',
        description: 'The third NFT in the Filebase Lootbox Bundle',
        image: 'ipfs://bafkreihm2qpjqbmhkyipqdgfi74lzgnkl55hxktfclidcbniveto2s37si',
        properties: {
          rarity: 'super rare!',
          fanciness: 10,
        }
      },
      supply: 10,
    }
  ]);

  console.log('NFTs created!')
  console.log(JSON.stringify(created, null, 2));
}

try {
  await main();
} catch (error) {
  console.error("Error minting the NFTs", error);
  process.exit(1);
}
Replace the following values to match your configuration:
- bundleModuleAddress: The bundle collection module address for your project’s bundle module. You can find it here:
- name: The name for each NFT you’re creating.
- description: The description for each NFT you’re creating.
- image: The IPFS CID you copied from the Filebase console, in the format ipfs://[CID]
Once you’ve configured the script to match your NFT Lootbox collection’s information, run the script:
node scripts/2-mint-bundle-nfts.js
You will receive an output similar to this:
NFTs created!
[
{
"creator": "0x9C33cD8e20c595Aad0C04ae58414916e5529ff6a",
"supply": {
"type": "BigNumber",
"hex": "0x32"
},
"metadata": {
"name": "Filebase Blue Cloud",
"description": "The first NFT in the Filebase Lootbox Bundle",
"image": "https://cloudflare-ipfs.com/ipfs/bafkreiha6dsjkd3jsdwdlla35aud3gzcykrvlhv4uxqnmxawsxefq
75tjm",
"properties": {
"rarity": "a bit rare",
"fanciness": 7
},
"id": "0",
"uri": "ipfs://QmWfduLinYFSX7wXtH6GAN28jsH7qkZgXnx4Q4sK1Kcwjo/0"
},
"ownedByAddress": {
"type": "BigNumber",
"hex": "0x00"
},
"underlyingType": 0
},
{
"creator": "0x9C33cD8e20c595Aad0C04ae58414916e5529ff6a",
"supply": {
"type": "BigNumber",
"hex": "0x32"
},
"metadata": {
"name": "Filebase Orange",
"description": "The second NFT in the Filebase Lootbox Bundle",
"image": "https://cloudflare-ipfs.com/ipfs/bafkreieehizit7mnwgp4ptperkugwmam62ey2znohe56an3issdpr
j3dce",
"properties": {
"rarity": "a bit rare",
"fanciness": 7
},
"id": "1",
"uri": "ipfs://QmWfduLinYFSX7wXtH6GAN28jsH7qkZgXnx4Q4sK1Kcwjo/1"
},
"ownedByAddress": {
"type": "BigNumber",
"hex": "0x00"
},
"underlyingType": 0
},
{
"creator": "0x9C33cD8e20c595Aad0C04ae58414916e5529ff6a",
"supply": {
"type": "BigNumber",
"hex": "0x0a"
},
"metadata": {
"name": "Filebase Robot",
"description": "The third NFT in the Filebase Lootbox Bundle",
"image": "https://cloudflare-ipfs.com/ipfs/bafkreihm2qpjqbmhkyipqdgfi74lzgnkl55hxktfclidcbniveto2
s37si",
"properties": {
"rarity": "super rare!",
"fanciness": 10
},
"id": "2",
"uri": "ipfs://QmWfduLinYFSX7wXtH6GAN28jsH7qkZgXnx4Q4sK1Kcwjo/2"
},
"ownedByAddress": {
"type": "BigNumber",
"hex": "0x00"
},
"underlyingType": 0
}
]
You will also see the NFTs listed in your Bundle Module on your Thirdweb dashboard:
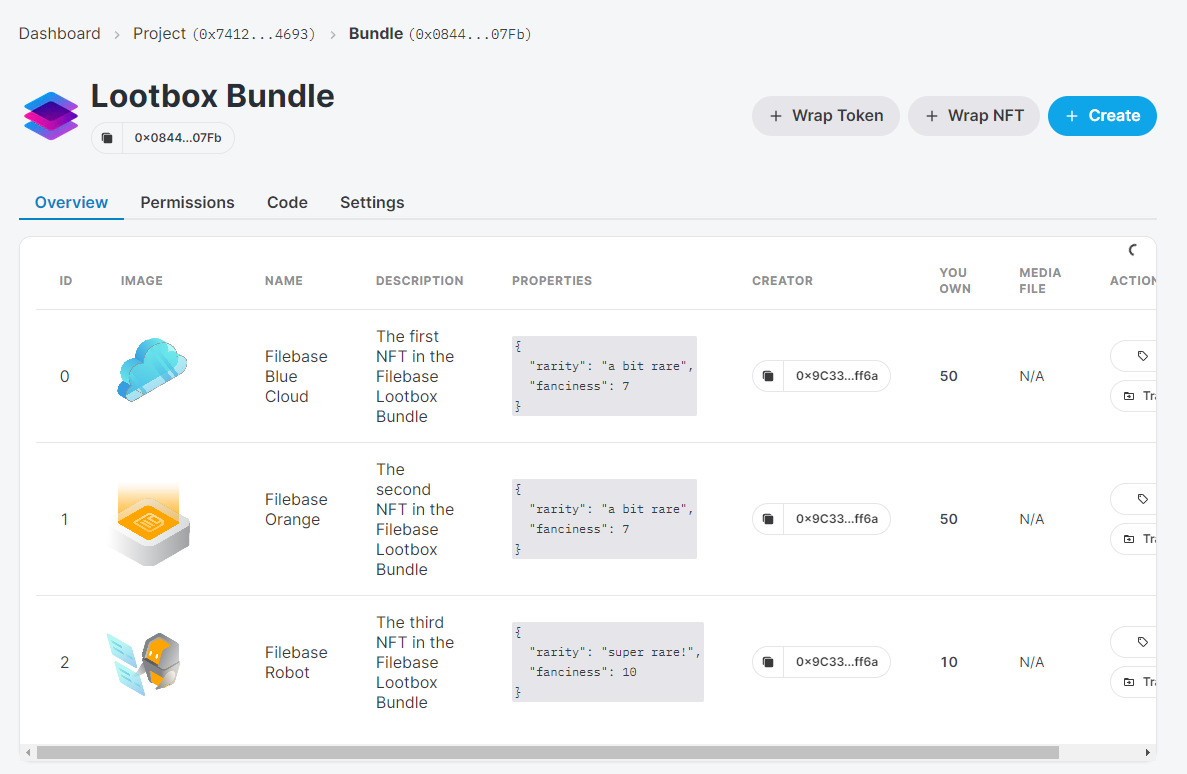
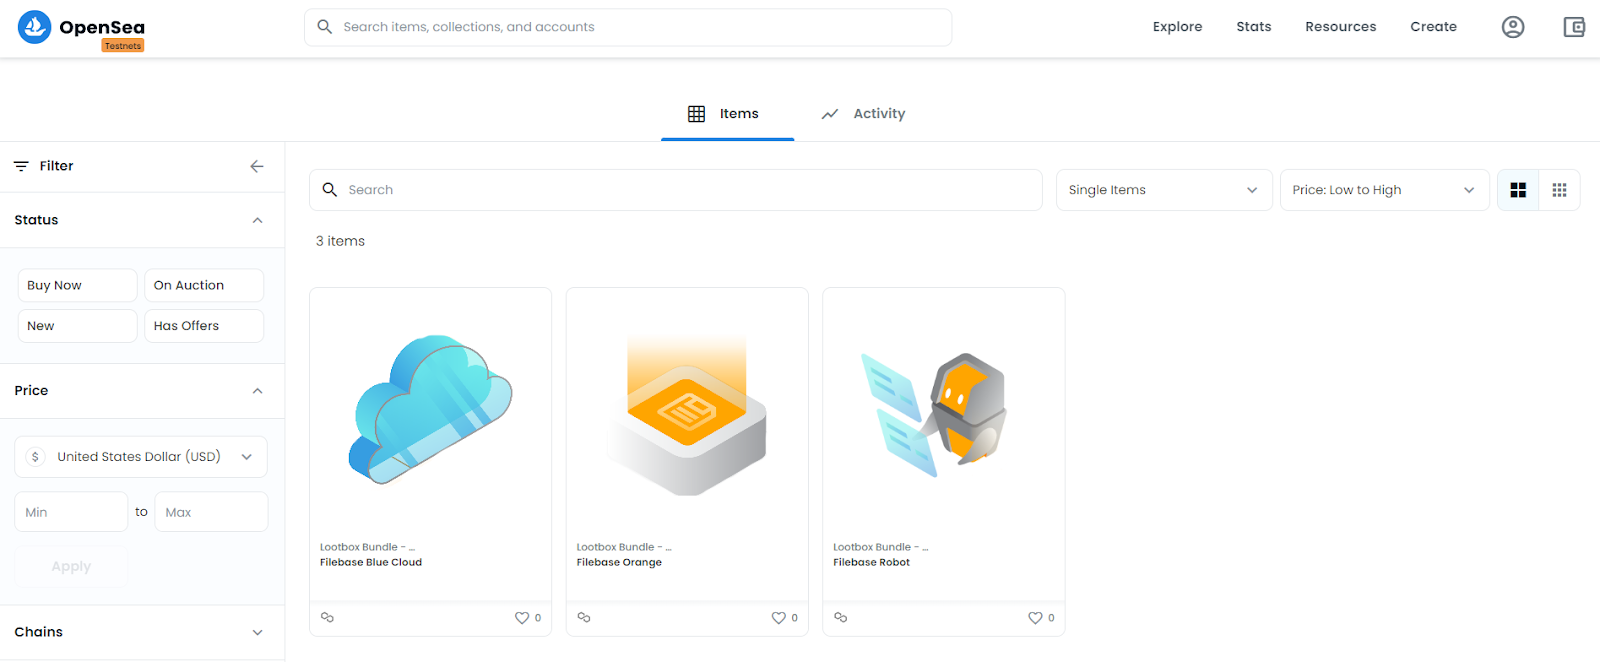
Your collection is now live, and you can view it on testnets.opensea.io by searching for your Bundle Collection Module Address:
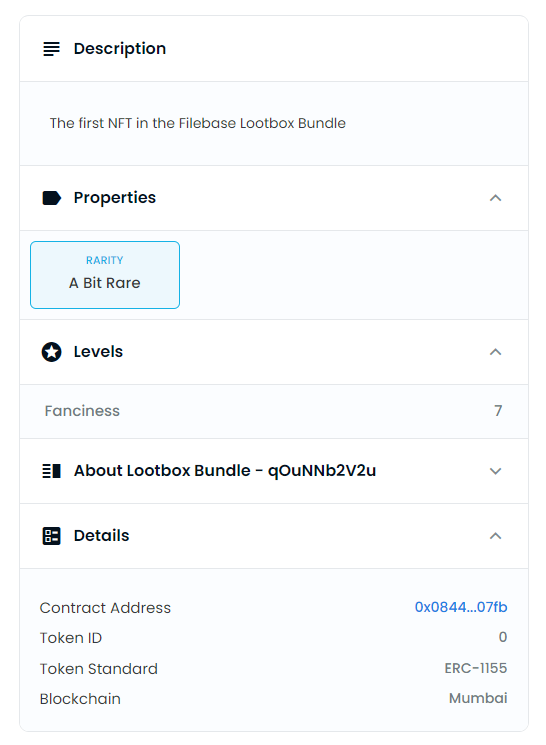
You can click on any of these NFTs and view their collection rarity and other metadata:
Now we need to create the Lootbox pack module to bundle our NFTs into a pack. Create a new script in your project’s scripts directory called 3-pack-module.js and enter the following content:
import { getApp } from './helpers.js';

async function main() {
  const app = await getApp();

  console.log('Deploying pack module...');

  const packModule = await app.deployPackModule({
    name: 'Lootbox Pack',
    sellerFeeBasisPoints: 0,
  });

  console.log(`Deployed pack module with address ${packModule.address}`);
}

try {
  await main();
} catch (error) {
  console.error("Error creating the pack module", error);
  process.exit(1);
}
Now, run the 3-pack-module.js script:
node scripts/3-pack-module.js
You will receive the following output:
Deployed pack module with address 0x6164eE4fC3173773B5e8a8A4745c67C3DAc0025b
Now that we have the pack module created on our project, we need to add our NFTs into the pack.
To do this, we’ll need to create another script in the scripts directory called 4-create-pack-from-bundle.js with the following content:
import { sdk } from './helpers.js';

async function main() {
  const bundleModuleAddress = '0x...'; // your bundle module address
  const bundleModule = sdk.getBundleModule(bundleModuleAddress);

  const packModuleAddress = '0x...'; // your pack module address
  const packModule = sdk.getPackModule(packModuleAddress);

  console.log('Getting all NFTs from bundle...');
  const nftsInBundle = await bundleModule.getAll();

  console.log('NFTs in bundle:');
  console.log(nftsInBundle);

  console.log('Creating a pack containing the NFTs from bundle...');
  const created = await packModule.create({
    assetContract: bundleModuleAddress,
    metadata: {
      name: 'Filebase NFT Lootbox',
      image: 'ipfs://bafkreihm2qpjqbmhkyipqdgfi74lzgnkl55hxktfclidcbniveto2s37si',
    },
    assets: nftsInBundle.map(nft => ({
      tokenId: nft.metadata.id,
      amount: nft.supply,
    })),
  });

  console.log('Pack created!')
  console.log(created);
}

try {
  await main();
} catch (error) {
  console.error("Error minting the NFTs", error);
  process.exit(1);
}
Replace the following values to match your configuration:
- bundleModuleAddress: Your Bundle Module Address
- packModuleAddress: Your Pack Module Address
- name: A name for your NFT Lootbox.
- image: An IPFS link using an IPFS CID for the image of your IPFS lootbox. In this example, we’re using one of the IPFS CIDs for one of the NFTs in the lootbox. If you’d like to use a different image, upload a new image to your Filebase IPFS bucket and use the CID associated with that image.
Next, run this script to create our Lootbox pack:
node scripts/4-create-pack-from-bundle.js
You should receive the following output:
Pack created!
{
id: '0',
metadata: {
id: '0',
uri: 'ipfs://QmZCfK816WRp93WsxAjpbpF64kaB5qeMXwzMpYK3DJanWc/0'
},
creator: '0x9C33cD8e20c595Aad0C04ae58414916e5529ff6a',
currentSupply: BigNumber { _hex: '0x6e', _isBigNumber: true },
openStart: 2022-02-21T17:41:45.000Z
}
You can find your pack on testnets.opensea.io by searching for the pack module address:
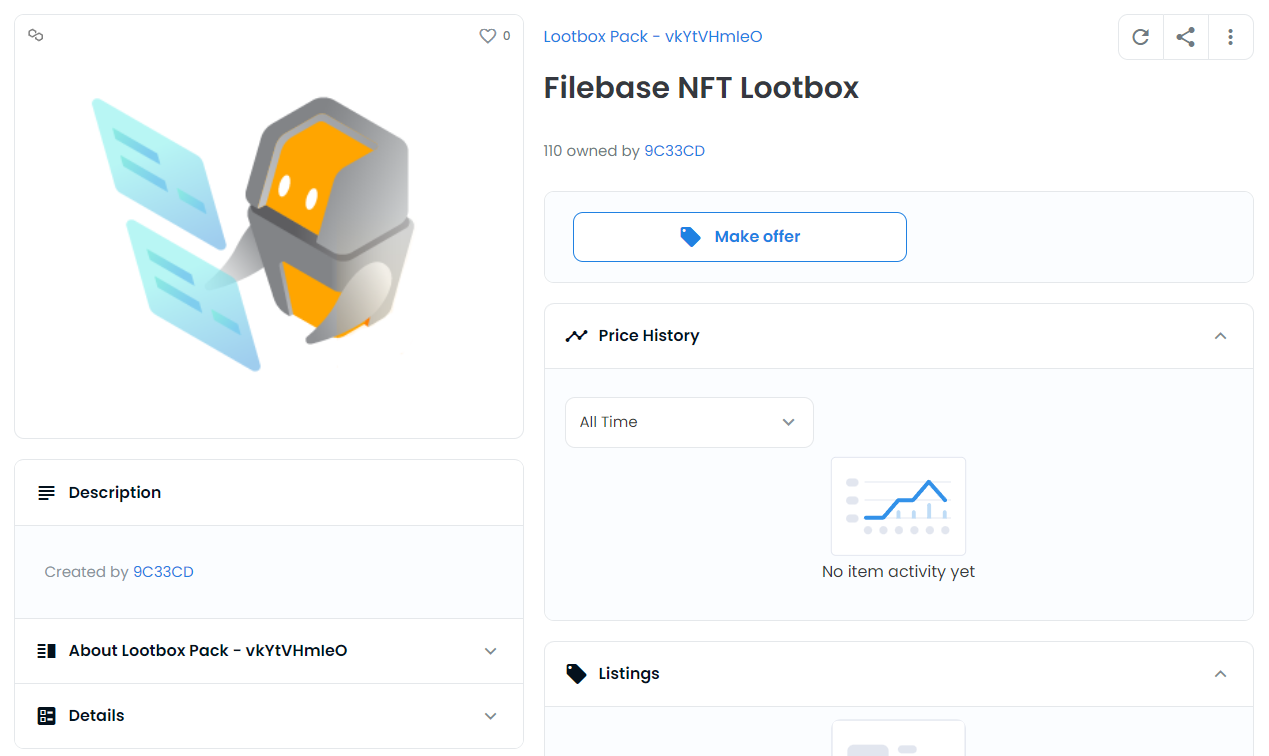
Note that the collection shows ‘110 owned’. This is the total number of NFTs we created when minting our NFTs for this bundle, since we made 50 copies of NFTs 1 and 2, and 10 copies of NFT 3.
Now, to open a pack we need a way to generate a random number for one of our pack’s NFTs.
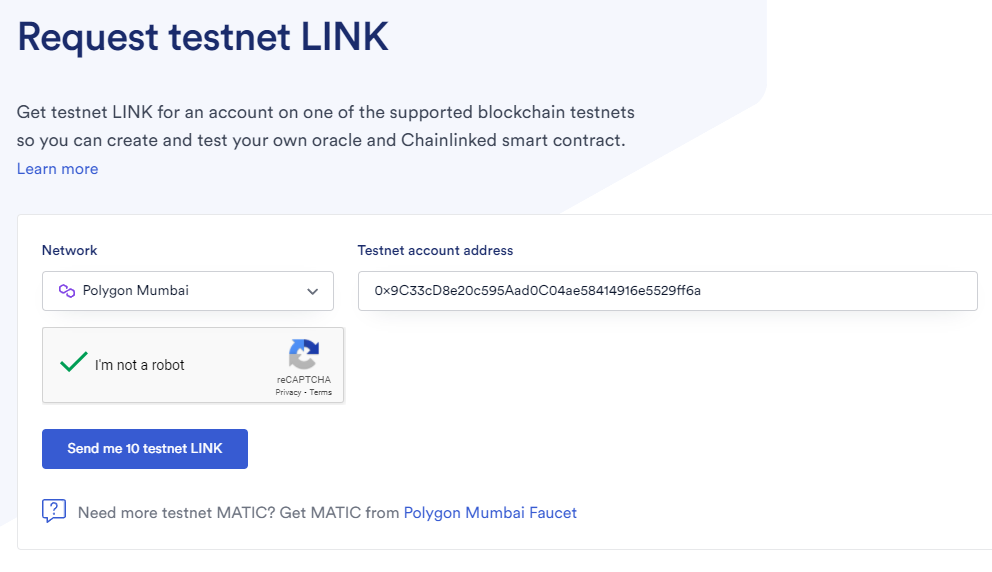
To do this, we’ll use Chainlink, a popular tool for random selection of smart contracts. To use Chainlink, you need tokens called LINKs. Since we’re using the Mumbai test network, we’ll use faucets.chain.link to get some test LINKs to use.
Select the Polygon Mumbai network, enter your wallet address, and request your test LINKs.
Now that we have our test LINKs, we need to deposit them into our Lootbox project. Create a new script in the scripts directory called 5-deposit-links.js with the following content:
import { ethers } from "ethers";
import { sdk } from "./helpers.js";

async function main() {
  const packModuleAddress = '0x...'; // your pack module address
  const packModule = sdk.getPackModule(packModuleAddress);

  console.log('Depositing link...')

  // LINK uses 18 decimals, same as Eth. So this gives us the amount to use for 2 LINK
  const amount = ethers.utils.parseEther('2');

  await packModule.depositLink(amount);
  console.log('Deposited!')

  const balance = await packModule.getLinkBalance();
  console.log(balance);
}

try {
  await main();
} catch (error) {
  console.error("Error depositing the LINK", error);
  process.exit(1);
}
Replace the packModuleAddress value with your pack module address.
Now it’s time to open one of our Lootbox packs. Create another new script in your scripts directory called 6-open-packs.js with the following content:
import { sdk } from "./helpers.js";

async function main() {
  const packModuleAddress = '0x...';
  const packModule = sdk.getPackModule(packModuleAddress);

  console.log('Opening the pack...');
  const opened = await packModule.open('0');
  console.log('Opened the pack!');
  console.log(opened);
}

try {
  await main();
} catch (error) {
  console.error("Error opening the pack", error);
  process.exit(1);
}
Replace the packModuleAddress value with your pack module address. Run your open-pack.js script to open your pack:
node scripts/6-open-pack.js
You should receive the following output:
Opening the pack...
Opened the pack!
[
{
name: 'Filebase Robot',
description: 'The third NFT in the Filebase Lootbox Bundle',
image: 'https://cloudflare-ipfs.com/ipfs/bafkreihm2qpjqbmhkyipqdgfi74lzgnkl55hxktfclidcbniveto2s37si',
properties: { rarity: super rare!, fanciness: 10 },
id: '2',
uri: 'ipfs://QmWfduLinYFSX7wXtH6GAN28jsH7qkZgXnx4Q4sK1Kcwjo/2'
}
]
You opened your first Lootbox successfully! You can call this script a few more times to collect all the different NFTs in your Lootbox collection. If you check testnets.opensea.io, you can see the number of packs you own has decreased, but the number of NFTs owned has increased.
Questions? Check out our excellent documentation found here, or simply reach out to us: hello@filebase.com or by joining by our Discord.