How to Backup Longhorn.io Kubernetes to Decentralized Storage

Filebase and Kubernetes are both great ways to store files across your infrastructure. They both have features that make it easy to build scalable, zero-downtime applications—and they are both free. In this tutorial, you'll learn how to quickly back up your Kubernetes cluster files onto decentralized storage networks with Filebase.
What is Kubernetes?
Kubernetes is an open-source container system designed for automating computer application deployment, scaling, and management.
Kubernetes clusters consist of multiple nodes, each running its own container (a cluster) with a minimal set of services such as networking, storage and compute. Common uses are for building applications or containers based on open source software, or for automating a local deployment environment. A cluster is the basic unit of functionality within a container environment.
Object storage is a great place for a Kubernetes cluster, and for file-system access in general. Filebase and Kubernetes provide a common API for retrieving files and directories from containers. This allows you to work with files on the surface infrastructure, but also keep your application layer isolated from the underlying volume types in a secure way.
What is Longhorn.io?
Longhorn.io is a distributed block storage system for Kubernetes that is lightweight, reliable and simple to use.
Longhorn.io can be configured to backup to a Filebase bucket. Read below for instructions on how to configure this set up.
Note: This guide assumes you already have a Kubernetes cluster deployed with networking enabled.
Prerequisites:
- Install Longhorn.io on your Kubernetes cluster.
- Have Your Filebase Access and Secret Keys. Learn how to view your access keys here.
- Create a Filebase Bucket. Learn how to create a bucket here.
Start by creating a Kubernetes secret that is stored in the namespace of your Kubernetes cluster. You can do so with the following kubectl command:
kubectl create secret generic filebase-secret \\
--from-literal=AWS_ACCESS_KEY_ID=Filebase-Access-Key \\
--from-literal=AWS_SECRET_ACCESS_KEY=Filebase-Secret-Key \\
--from-literal=AWS_ENDPOINTS=https://s3.filebase.com
Then, save the following file as minio_backupstore.yaml. This file uses the Kubernetes cluster namespace ‘default’. If your namespace is something else, change all references to ‘namespace: default’ to the name of your namespace:
apiVersion: v1
kind: Pod
metadata:
  name: longhorn-test-minio
  namespace: default
  labels:
    app: longhorn-test-minio
spec:
  volumes:
  - name: minio-volume
    emptyDir: {}
  - name: minio-certificates
    secret:
      secretName: filebase-secret

  containers:
  - name: minio
    image: longhornio/minio:RELEASE.2020-10-18T21-54-12Z
    command: ["sh", "-c", "mkdir -p /storage/backupbucket && mkdir -p /root/.minio/certs && ln -s /root/certs/private.key /root/.minio/certs/private.key && ln -s /root/certs/public.crt /root/.minio/certs/public.crt && exec /usr/bin/minio server /storage"]
    env:
    - name: MINIO_ACCESS_KEY
      valueFrom:
        secretKeyRef:
          name: filebase-secret
          key: AWS_ACCESS_KEY_ID
    - name: MINIO_SECRET_KEY
      valueFrom:
        secretKeyRef:
          name: filebase-secret
          key: AWS_SECRET_ACCESS_KEY
    ports:
    - containerPort: 9000
    volumeMounts:
    - name: minio-volume
      mountPath: "/storage"
    - name: minio-certificates
      mountPath: "/root/certs"
      readOnly: true
---
apiVersion: v1
kind: Service
metadata:
  name: minio-service
  namespace: default
spec:
  selector:
    app: longhorn-test-minio
  ports:
    - port: 9000
      targetPort: 9000
      protocol: TCP
			sessionAffinity: ClientIP
Next, apply this configuration to spin up a MinIO pod:
kubectl create -f minio_backupstore.yaml
Now we need to go to the Longhorn UI. This can be found by running the command:
kubectl get svc
Then, record the IP address for the longhorn-frontend pod:

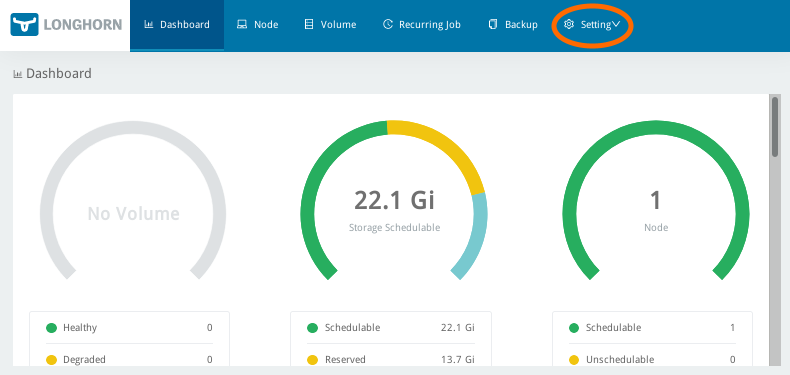
In your web browser, navigate to this IP address. In the top navigation bar, click Settings. Scroll to the Backup section.
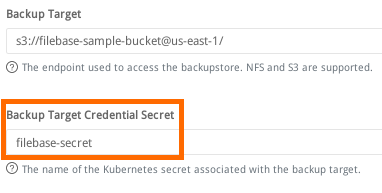
In the Backup section, set Backup Target to:
s3://filebase-bucket-name@us-east-1/
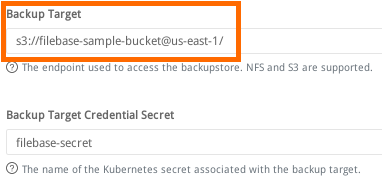
Make sure that you have / at the end, otherwise you will get an error. A subdirectory may also be used.
Next, in the Backup section set Backup Target Credential Secret to the Kubernetes secret we created at the start of this guide:
filebase-secret
Then scroll to the bottom of the page and select ‘Save’. Now we can create a backup. To do this, select ‘Volumes’ from the top navigation bar.
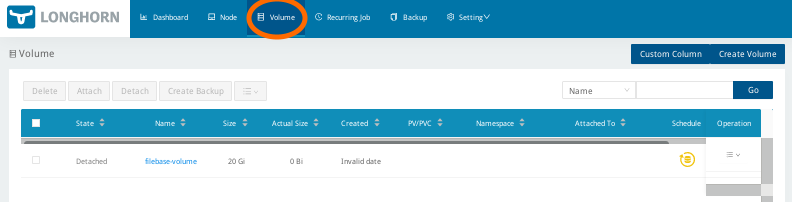
Select the volume(s) you want to backup, make sure they are ‘attached’, and select ‘Create Backup’.

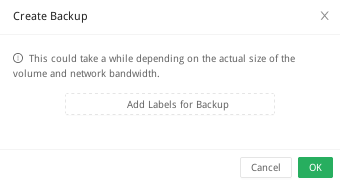
From here, you can add any desired tags for the backup, then select ‘Ok’ to start the backup.
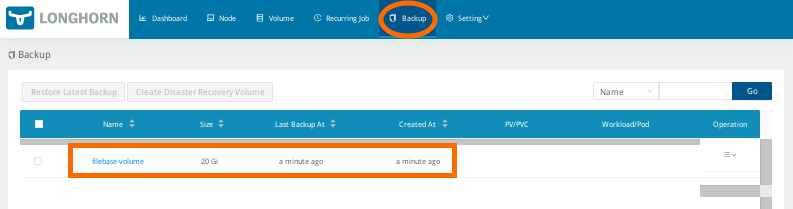
Once you've started the backup, you can check it's status and view any previous backups by selecting ‘Backup’ from the top navigation bar.
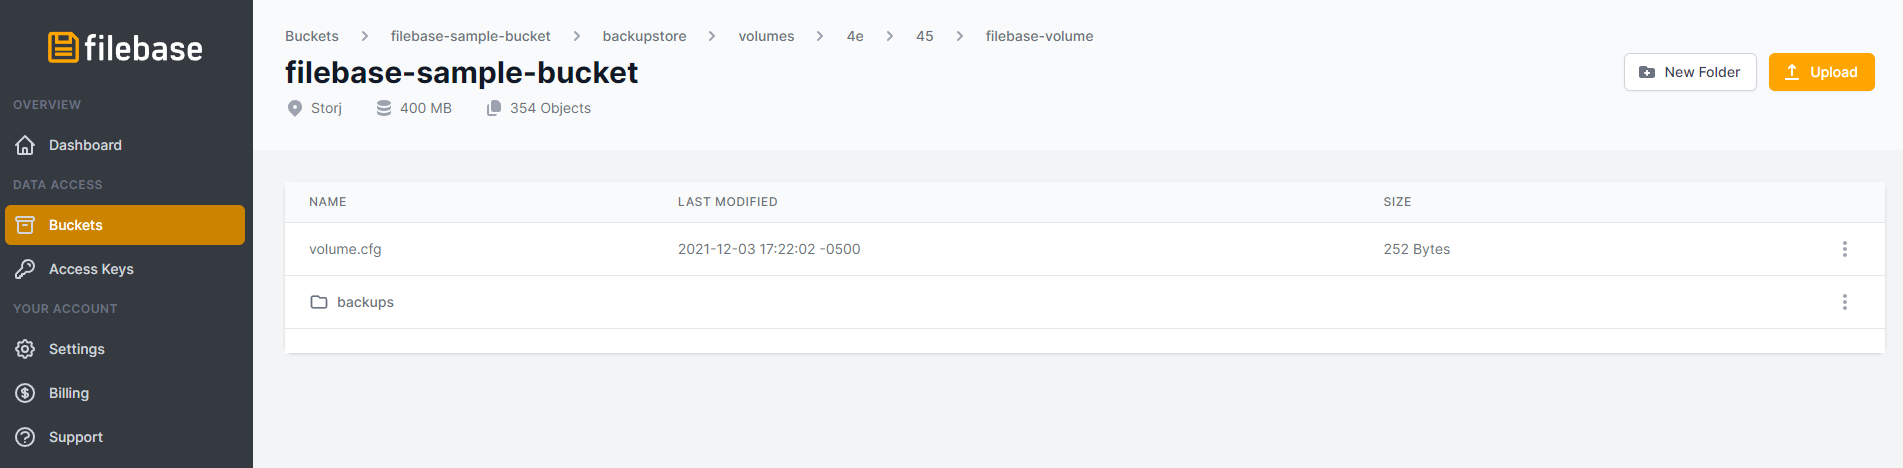
Finally, check for the backup in your Filebase bucket. Log into the Filebase console and confirm that the backup has been stored in the specified bucket.
This is just one of many applications showcasing the use of Filebase with a Kubernetes cluster.
For more guides showcasing Kubernetes with Filebase, check out the Filebase docs section on Kubernetes here.
Experience the power of Web3 in seconds: Get started with 5GB of free object storage with no expirations and no trials.
Need more storage? Use code "WEB3WELCOME" for 1TB of storage (your first month free) on us!